
11 Print Setup: Using Netfabb, Cura (Ultimaker), and PreForm (Formlabs)
In this chapter, we cover
- How to repair your STL file for printing
- How to use the Cura software to make your STL file print-ready for Ultimaker printers
- Basic print setting
- Custom print settings
- Resizing and duplicating your model
- How to use the PreForm Software to print using the Formlabs printer
Repairing your STL file (Ultimaker only)
Before loading the STL model in Ultimaker’s Cura software, you will need to make sure that the model is fully manifold, meaning there are no holes or overlapping edges, surfaces of the model are facing the correct direction, amongst many other minor issues that can happen with 3d models. Ensuring your model is “manifold” will increase the likelihood of a successful print, saving time and resources in the long run. To do this, you will want to “repair” the model using Autodesk Netfabb:
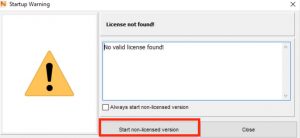
1. Open the Autodesk Netfabb app (under the Autodesk application folder) on the computer workstation in the DSC.
2. If prompted for a license, select “Start non-licensed version”
3. follow the steps on this video to repair the model:
Slicing the print job in Cura (Ultimaker only)
Once you have your fully repaired file, you will need to turn that STL file into a file format that the 3D printer can read: that is, a file of code that includes specific movements that the machine will make. The file of code is called a G-code (with a .gcode file extension) and the process of turning an STL into a G-code is called slicing.
To ‘slice’ your STL into a G-code, you will use Ultimaker’s Cura software.
There is lots of great information on Ultimaker’s webpage about how to use Cura. The version in the DSC makerspace has already been set up to be used with the DSC printers, so you won’t need to add or manage any of the printers within the software. Furthermore, you will not need to sign in to an Ultimaker account or connect to Ultimaker Cloud.
1. Open the Ultimaker Cura Software:
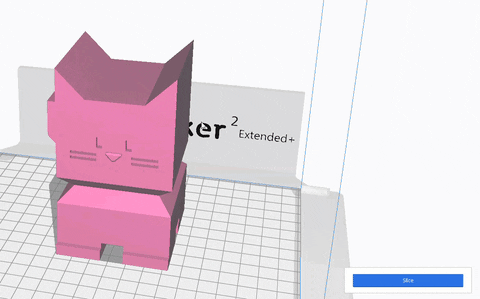
2. In the top left hand corner, select the printer with which you will be printing. The printer’s name can be found on the top of the machine near the Ultimaker logo on the computer in the DSC. This will ensure the correct G-Code is created for your printer. If you are using Cura on your own computer, make sure you select either the Ultimaker 2+ Extended or Ultimaker 3.

3. The video below should cover the remaining steps needed to create your model’s G-code (the video should start at 9m:42s):
Orienting, resizing and duplicating in Cura
When a design is selected, a few important and basic features become available on the left hand side of the Cura window (demonstrated at 18m 41s in the video above). Some of the more useful and basic tools are:
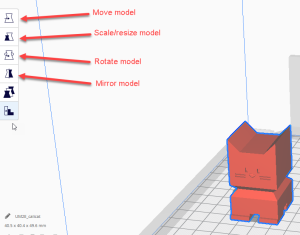
When these tools are toggled on (by clicking them), the model can be moved, rotated, resized, re-oriented and mirrored. When doing this, you have the option of manipulating the model manually with your mouse cursor, or by entering values.
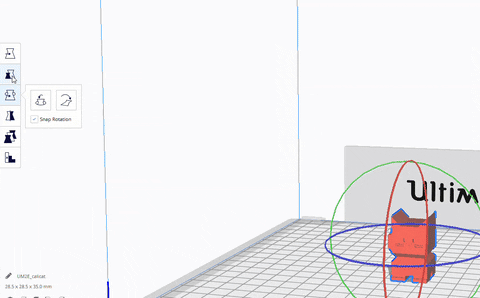
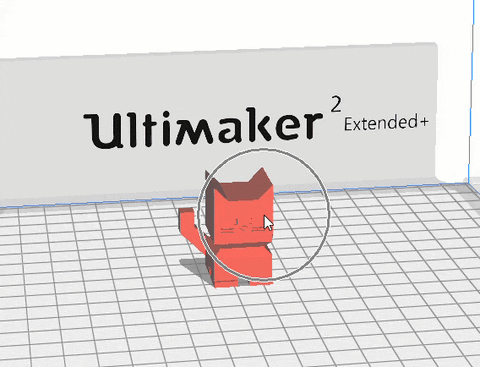
When the “Rotate Model” tool is toggled on, three sets of different coloured circles appear around your model. Using your cursor, you can grab any one of the nodes on the circles to drag and re-orient the model.
In the GIF below, the model is being re-oriented to lay on its side to ensure that no supports are needed.

Below is an example of resizing a model by changing the percentage value:
Furthermore, right-clicking on a model will give you access to a number of features as well, such as multiply selected model and delete selected model:
Preview the Layer Build:
After you’ve sliced your model to get the .gcode, you should check the layers of your build to ensure there aren’t any holes or gaps where parts are supposed to be connected, etc. To view, slice your model and then in the bottom right hand side, select “preview.” At the bottom of the screen or on the right hand side you will see a play button and a bar you can slide back and forth to view the layers, as pictured below.
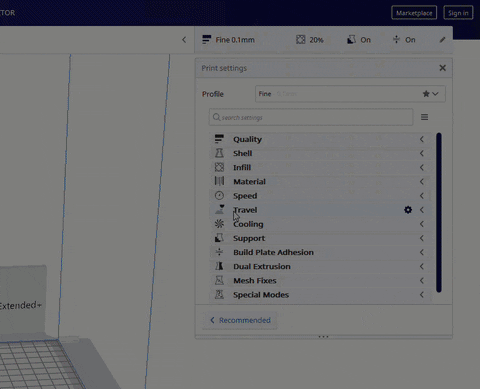
Custom Print Settings
Even for a first-time user of Cura, it may be necessary to use a few of the Custom Print Settings (14m:02s in the video above). If you hover your mouse’s cursor over a setting, an information box will appear that explains the setting.
![]()
Support
Of the many many settings that can be customized, the support setting is one that often requires attention. In Custom Settings, when the “Generate Support” box is checked on, you will be given the option to choose what type of Support Placement you would like:
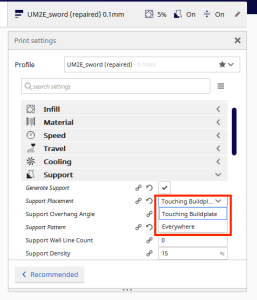
For a refresher about these different types of supports (touching build plate and everywhere), please review the previous chapter‘s section on overhangs and supports.
Speed
Changing the speed settings will impact your print in many ways. Too slow and the filament might clump and look messy, or too fast and it will also look messy. The average speed is about 80mm per second; however, see Ultimaker’s guidelines for more information:
https://support.ultimaker.com/hc/en-us/articles/360012611079-Speed-settings
If you are unsure of what speed to use, leave the speed settings as the Cura’s defult as this will work for most prints.
Build Plate Adhesion
There are also a few different options for creating solid print-bed adhesion.

Please review the differences between Skirt, Brim and Raft in the previous chapter.
Saving File
After clicking “Save to File” (24m:01s in the video above), save the G-code file to either a USB stick or an SD card (depending on which printer you will be using).
Once the file is saved on the USB, be sure to eject the device before removing it or the file may corrupt and cause errors when printing:

Setting up the print job in PreForm (Formlabs only)
When printing with the Formlabs Form 2, you will prepare your file using the PreForm software. Unlike the Ultimakers, the Formlabs’ software does not require you to “repair” or slice your file before printing. The video below shows you how to use PreForm effectively:
Test your Knowledge:
For the following question, you will need to download this model and open it in the Cura software.
3D Now. (2020, December 9). [Updated] The Ultimate Beginner’s Guide to Cura Slicer! [Video]. Youtube. https://www.youtube.com/watch?v=l_wDwySm2YQ&t=582s
Dezign (2016, May 6). Cali Cat – The Calibration Cat. Thingiverse. https://www.thingiverse.com/thing:1545913
