
Getting Started in Google Earth Pro
Once you have downloaded and installed Google Earth Pro for desktop, open the program on your computer.
In the search bar in the upper left part of your screen, type in “Mount Royal University”. Click Search.
You are now looking at a bird’s eye view, or map view of the Mount Royal University (MRU) campus. This is definitely a bird’s eye view: in the bottom right-hand* corner of the image it will tell you the altitude from which you are looking down. In Figure T1, we are looking down at MRU from an altitude of 2.12 km!
| *Note that these instructions have been written for Google Earth Pro on a PC running Windows 10. If you are using a Mac computer, the description of where certain features are found may differ. Contact your lab instructor for more information. |
Text boxes like this one contain questions you need to answer, or specific actions you need to practice, in order to complete this tutorial assignment.

Let’s point out a few things you should know about Google Earth.
- The red place marker shows the name and the exact location of the place you typed into the search bar. (See the red box in Figure T1 below)
- In the top right corner, the compass shows which direction is north in the current view. In Figure T1, north is toward the top of the image (in the direction of the blue arrow).
- The bar in the bottom left corner of the image shows the scale bar (inside the orange box in Figure T1). A scale bar helps you determine the actual, on the ground, distance between points or along lines. In Figure T1 below, the entire length of the scale bar represents a real distance of 230 m, and each division along the scale bar represents a real distance of 57.5 m.
Try spinning the view around by clicking on the ‘N’ on the compass, holding down your mouse, and spinning the ‘N’ around. You can also hold down the shift key and use the right and left arrow keys on your keyboard to rotate the view.
To return to the original view press the letter ‘r’ on your keyboard, or click View, Reset, Compass.
Let’s check out a few more features in Google Earth. Look at the numbers in the bottom right corner of the image (See red box in Figure T2).

These numbers are the coordinates for the cursor location and they change as you change the position of the cursor. Coordinates are used to specify an exact location using a series of numbers in a grid system. Grid systems are used to divide the Earth’s surface into imaginary squares formed by two sets of perpendicular lines. Two common grid systems used in Google Earth that we will use throughout this term are geographic (latitude and longitude), andUniversal Transverse Mercator(UTM). We will come back to the concept of grid systems in the next part of this tutorial.
The sliding bar in the blue box in Figure T2 can be used to zoom in and out. You can also zoom in and out using the scroll wheel on your mouse or the keyboard shortcuts defined in the table below. Notice how when you do this, the number value on the scale bar changes. Zooming in and out changes the scale of the image.
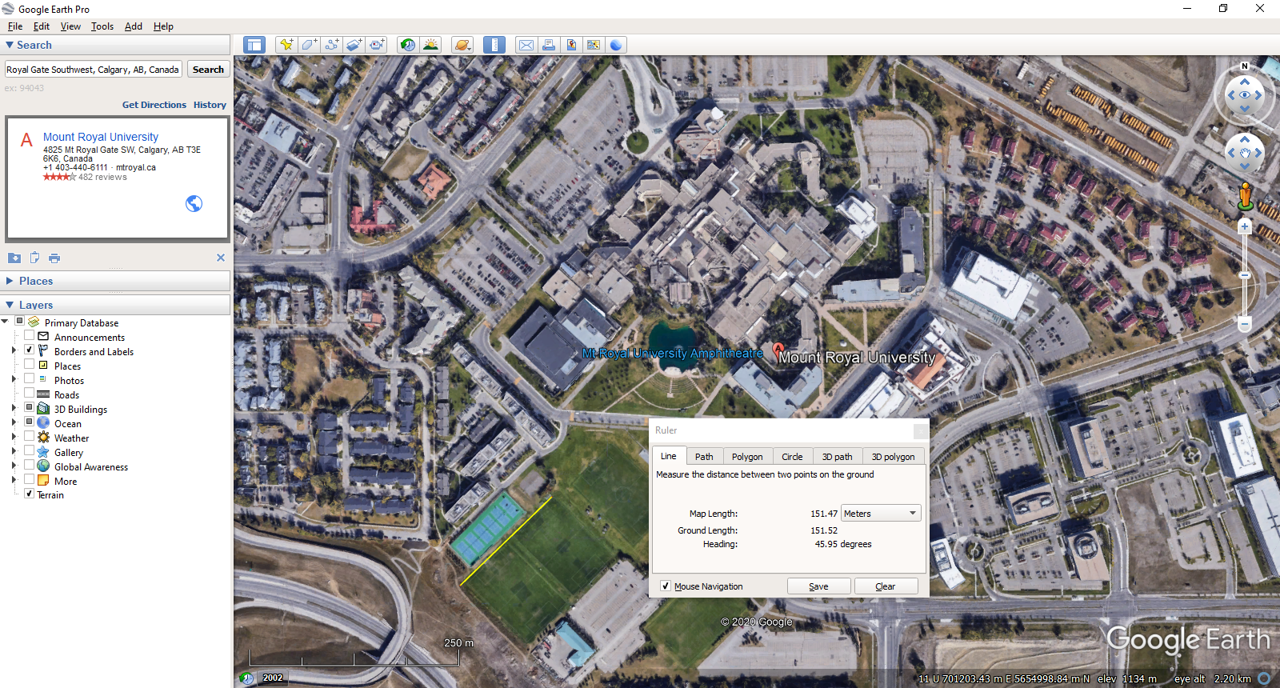
Now let’s explore how we can measure distances in Google Earth. First, make sure you are back in map view. To do this, on your keyboard press ‘r’, or click View, Reset, Tilt and Compass.
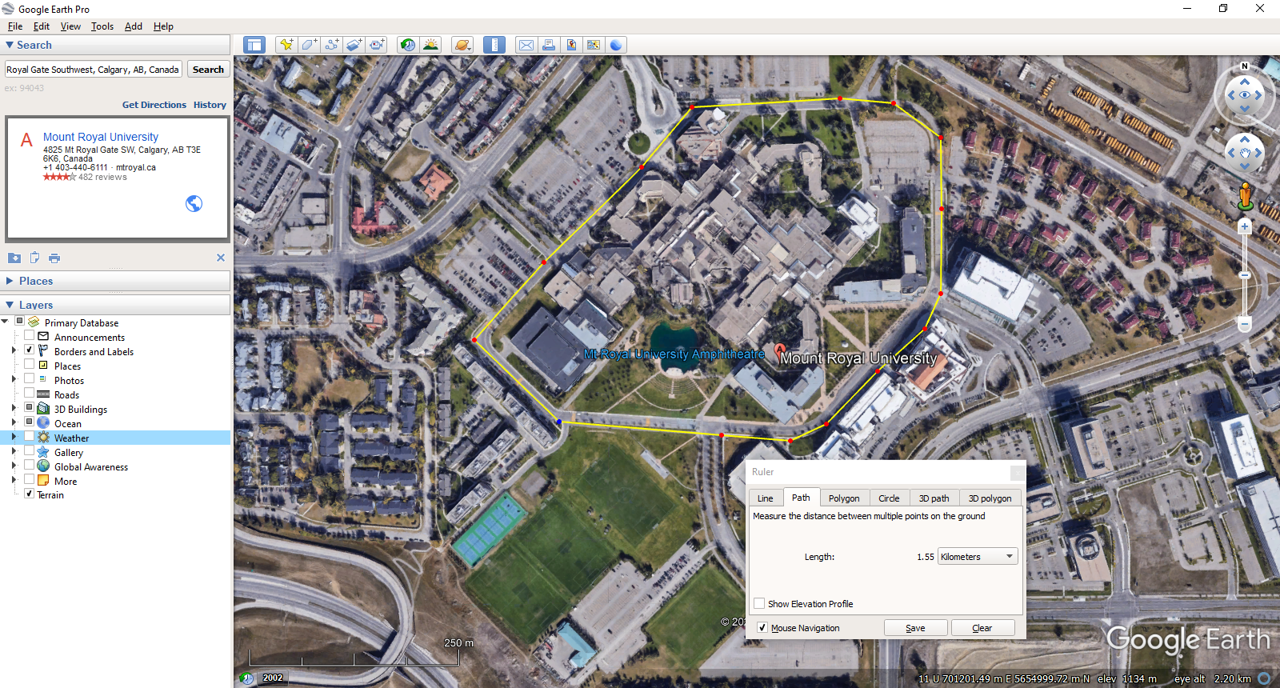
You can also measure the length of a path, rather than just a straight line. Figure T5 shows a measured path along the ring road around MRU. The total length of the path is 1.55 km. Notice that you can change the unit of measurement by using the drop down menu. Click clear to erase the line or path you measured.

Let’s try changing some options in Google Earth Pro. Click on Tools, Options. The dialogue box shown in Figure T6 should appear. Examine the 3D View tab, where you can choose between using UTM coordinates or Lat/Long coordinates (Figure T6, red box). Choose to display lat/long coordinates in one of three ways: decimal degrees, degrees-minutes-seconds, or degrees-decimal minutes. You can also change the default units of measurement (Figure T6, blue box) from imperial (feet, miles) to metric (metres, kilometres). When you are happy with your selections, click Apply.
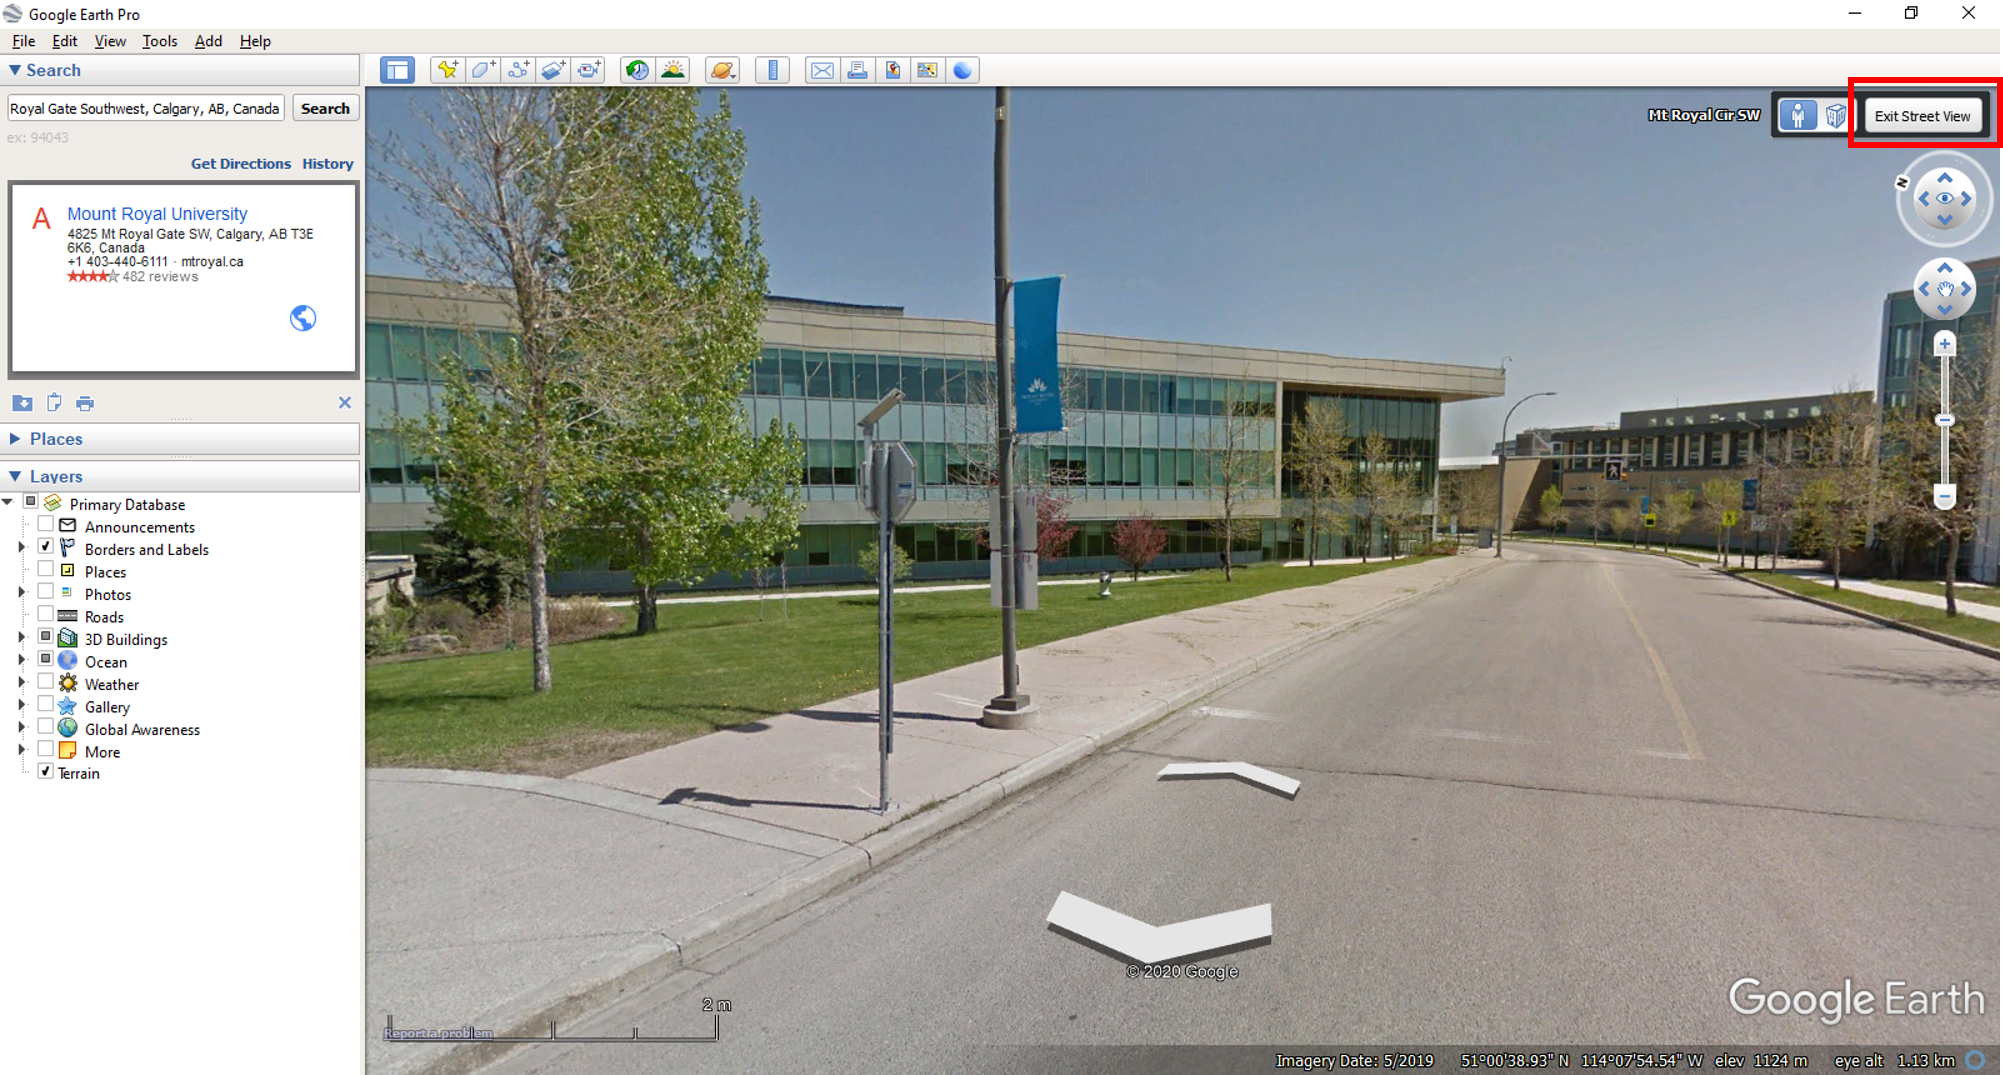
Finally, let’s examine some historical satellite imagery. Google Earth is a great tool for examining changes to Earth’s surface over the past few decades. By clicking on the clock icon in the top toolbar (Figure T7, red arrow), you can see historical imagery for the area on your screen. Use the scroll bar to look through the historical imagery of the city of Calgary from an altitude of ~70 -80 km.

What distance is represented by the entire length of the scale bar?
In what year was the oldest image of this area at this scale captured?
In what year was the most recent image of this area at this scale captured?
Keyboard Shortcuts for Google Earth Pro
| Action | Shortcut (Windows & Linux) | Shortcut (Mac) |
| Move left | Left arrow | Left arrow |
| Move right | Right arrow | Right arrow |
| Move up | Up arrow | Up arrow |
| Move down | Down arrow | Down arrow |
| Rotate clockwise | Shift + Left arrow | Shift + Left arrow |
| Rotate counter-clockwise | Shift + Right arrow | Shift + Right arrow |
| Tilt up | Shift then click and drag down | Shift + Down arrow |
| Tilt down | Shift + Up arrow
Shift then click and drag up |
Shift + Up arrow |
| Reset to north-up view | n | n |
| Reset to top-down tilt | u | u |
| Return to plan and north-up view | r | r |
| Zoom in | + | + |
| Zoom out | – | – |
| Stop current motion | Spacebar | Spacebar |
Media Attributions
- Figures T1, T2, T3, T4, T5, T6, T7 used under the following Google Maps and Google Earth guidelines.
graphic or visual representation of the scale of a map
A set of numbers referring to a grid system used to specify an exact location on Earth.
A system used to divide the Earth's surface into squares using two sets of perpendicular lines for the purpose of specifying locations and navigation.
A grid system used to specify locations on Earth using coordinates of latitude and longitude.
A grid system used to specify locations on Earth's surface using easting and northing coordinates measured in metres.
